Every time you install an update or system installs it automatically, the Windows Update history is updated with the KB number. You can check the Windows Update history, but the GUI provides no option to print the list of updates installed from the Windows Update history screen. Here a couple of tools from Nirsoft site that can help you print the Windows Update history.
How to Print Your Windows Update History By Exporting to a file
Using WinUpdatesList
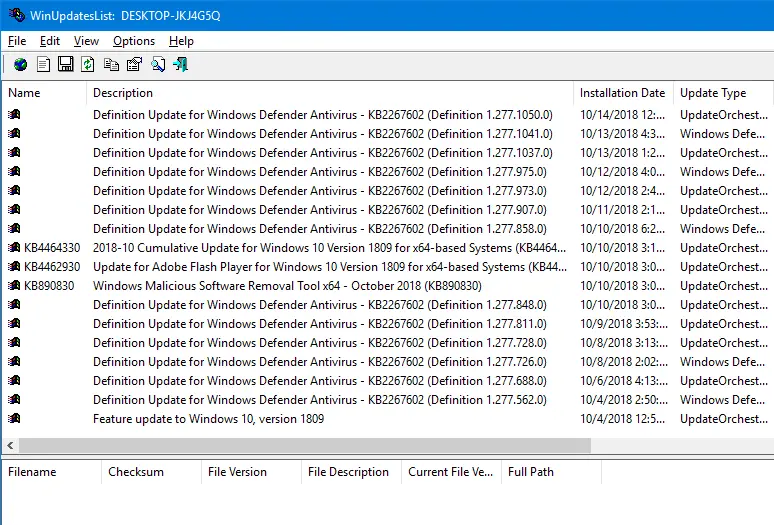
WinUpdatesList displays the list of all Windows updates, including Service Packs and Hotfixes installed on your local computer. You can copy the list of updates to the clipboard, or save it to text/HTML/XML file in a single click. The following fields are shown for each update listed.
Name, Description, Installation Date, Update Type, Web Link, Long Description, Last Modified Time, Installed by, Display Version, Application, Uninstall Command

Select all entries and click the Save button. From the file types drop-down list box, select the format in which the data is to be written. WinUpdatesList works in all versions of Windows.
WinUpdatesView (Windows Updates History Viewer)
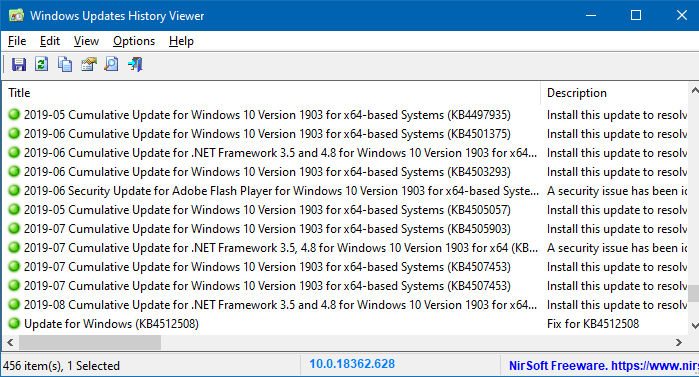
WinUpdatesView is a simple tool from Nirsoft that displays the history of Windows updates on your system. WinUpdatesView can load the Windows updates history from your local system, using API, and it can also read and parse the Windows updates database file (DataStore.edb) from an external drive or from a remote computer on your network.

RELATED: How to Check if a Specific Windows Update (KB) is Installed on your Computer?
Using SysExporter
SysExporter allows you to grab the data stored in standard list-views, tree-views, list boxes, and combo boxes from almost any application running on your system, and export it to text, HTML or XML file. Let’s use SysExporter to export the Windows Update list to a text file on a Windows 7 computer.
Unfortunately, on a Windows 10 computer, SysExporter is unable to grab the Windows updates list from Control Panel → All Control Panel Items → Programs and Features → View installed updates list view box.
To export the Windows Update History in Windows 7, use these steps:
- Download SysExporter tool and run it
- Click Start, All Programs, Windows Update
- Click View update history
- In SysExporter, select the item named View update history (ListView)
- In the lower pane, select all the entries (CTRL + A)
- Right-click and choose Copy selected items (Tab delimited)
- Open Notepad and paste the text from the clipboard.
- Save the Notepad document.
You can also open the exported CSV file using Microsoft Excel so that it will be shown neatly with column headers.
Using PowerShell
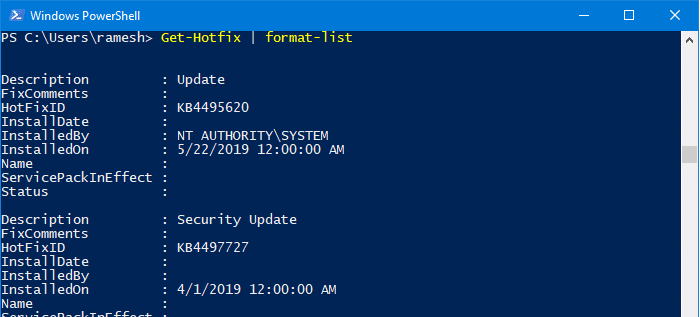
Launch Windows Powershell. Copy and paste the following code in the PowerShell console:
Get-Hotfix | format-list
This lists the installed updates for your Operating System.

The following code snippets will list all kind of updates (both Windows and app) but only those installed using Windows Update, Microsoft Update, Automatic Updates feature or via WSUS.
# Convert Wua History ResultCode to a Name
# 0, and 5 are not used for history
# See https://msdn.microsoft.com/en-us/library/windows/desktop/aa387095(v=vs.85).aspx
function Convert-WuaResultCodeToName
{
    param(
        [Parameter(Mandatory=$true)]
        [int] $ResultCode
    )

    $Result = $ResultCode
    switch($ResultCode)
    {
      2 {
        $Result = "Succeeded"
      }
      3 {
        $Result = "Succeeded With Errors"
      }
      4 {
        $Result = "Failed"
      }
    }

    return $Result
}

function Get-WuaHistory
{

  # Get a WUA Session
  $session = (New-Object -ComObject 'Microsoft.Update.Session')

  # Query the latest 1000 History starting with the first recordp
  $history = $session.QueryHistory("",0,1000) | ForEach-Object {
     $Result = Convert-WuaResultCodeToName -ResultCode $_.ResultCode

     # Make the properties hidden in com properties visible.
     $_ | Add-Member -MemberType NoteProperty -Value $Result -Name Result
     $Product = $_.Categories | Where-Object {$_.Type -eq 'Product'} | Select-Object -First 1 -ExpandProperty Name
     $_ | Add-Member -MemberType NoteProperty -Value $_.UpdateIdentity.UpdateId -Name UpdateId
     $_ | Add-Member -MemberType NoteProperty -Value $_.UpdateIdentity.RevisionNumber -Name RevisionNumber
     $_ | Add-Member -MemberType NoteProperty -Value $Product -Name Product -PassThru

     Write-Output $_
  }

  #Remove null records and only return the fields we want
  $history |
      Where-Object {![String]::IsNullOrWhiteSpace($_.title)} |
          Select-Object Result, Date, Title, SupportUrl, Product, UpdateId, RevisionNumber
}
Src: Stack Overflow
And then run:
Get-WuaHistory | Format-Table
The command-line outputs the list of installed WU updates on the console window
To output the results to a .html file, run:
Get-WuaHistory | sort-object Date -Unique | ConvertTo-Html | Out-File d:\wulist.htm
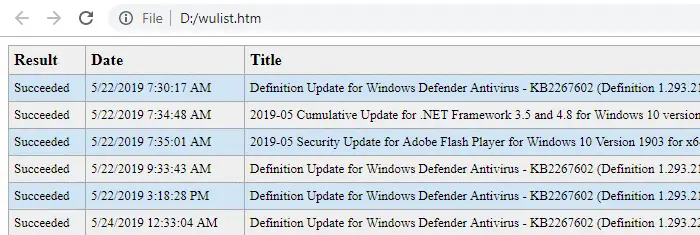
This outputs the list of installed updates to an HTML file named d:\wulist.htm
You can add a little bit of CSS table styling to the HTML file and make it look neater as below:

Alternately, you can also use this PowerShell code snippet which gets only the Title, Description, Date and Operation fields:
$Session = New-Object -ComObject "Microsoft.Update.Session"
$Searcher = $Session.CreateUpdateSearcher()
$historyCount = $Searcher.GetTotalHistoryCount()
$Searcher.QueryHistory(0, $historyCount) | Select-Object Title, Description, Date,
    @{name="Operation"; expression={switch($_.operation){
        1 {"Installation"}; 2 {"Uninstallation"}; 3 {"Other"}
}}} | Sort-Object Date -Unique | ConvertTo-Html | Out-File d:\wulist.htm
RELATED: How to Check if a Specific Windows Update (KB) is Installed on your Computer?
One small request: If you liked this post, please share this?
One "tiny" share from you would seriously help a lot with the growth of this blog. Some great suggestions:- Pin it!
- Share it to your favorite blog + Facebook, Reddit
- Tweet it!
Thank you, thank you, and thank you! Saved uncountable headaches.