System Restore has always been an invaluable rescue feature built-in with all versions of Windows. It helps you revert back to a previous working state if something goes haywire after installing a software, device driver or an OS update delivered through Windows Update. This post tells you how to enable System Restore, create a restore point, and rollback to a previous restore point.
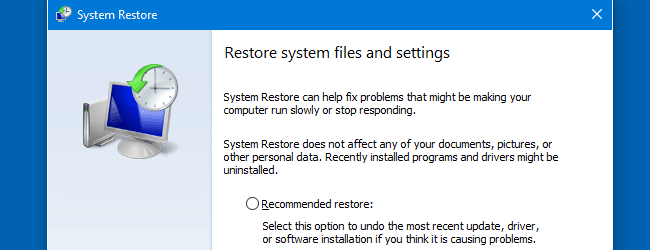
Information in this post applies to all versions of Windows, including Windows 10.
Creating a Restore Point
Press WinKey + R to bring up the Run dialog,. Type SystemPropertiesProtection.exe and press ENTER.
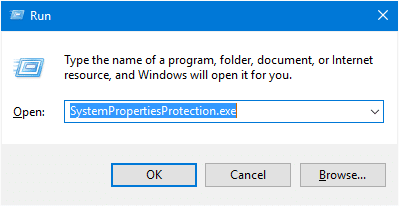
If you prefer the GUI to launch the System Restore Properties dialog, do a search for “restore point” in the Start menu or from Control Panel. Running the above command might be quicker, and it works in all Windows Operating Systems.
This launches the System Restore Properties dialog.
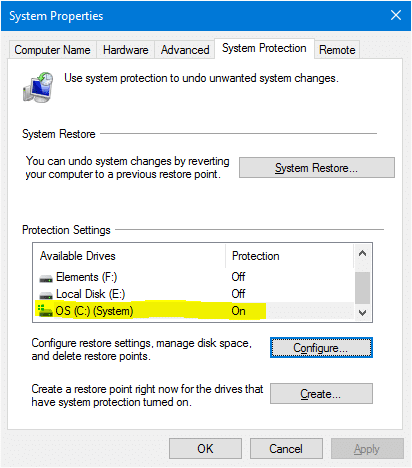
Check if protection is enabled for the system drive.. the drive where Windows is installed. You don’t have to enable protection for other drives.. that’s optional. If protection of the System drive is turned off, click the Configure button.
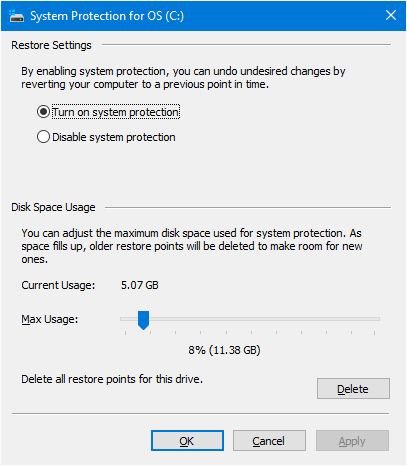
Click Turn on system protection, and adjust the Max Usage slider depending upon the free space available in the partition. The more disk space you allocate, more restore point choices would be available when you want to rollback your system to a previous state. If you’re running short of disk space, set the slider to a lower value.
Click OK, and you’ll be back to the System Properties dialog (Fig 1).
Click Create… to create a restore point, type the description and click Create.
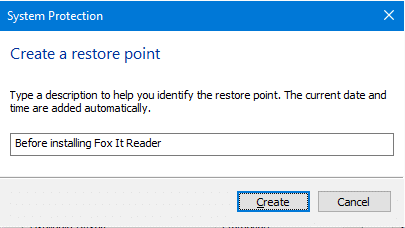


Restore point is now created successfully.
Related articles
- How to Create Restore Points Daily Using Task Scheduler in Windows
- How to Create System Restore Points using Script or Command-Line
Perform a System Restore Rollback
So, you installed a 3rd party program or driver update, and find that the responsiveness of your system very slow or experience occasional crashes. You can restore your system to a previous restore point, choosing a restore point whose date precedes the date of installation of the problematic software or driver.
If Windows doesn’t load, you can perform a System Restore rollback using Windows Recovery options. For details, check out post Perform System Restore Rollback Offline in Windows 10 [Recovery Options]
Start System Restore by clicking System Restore button (Fig 1), or by running the file RSTRUI.EXE from Run dialog.
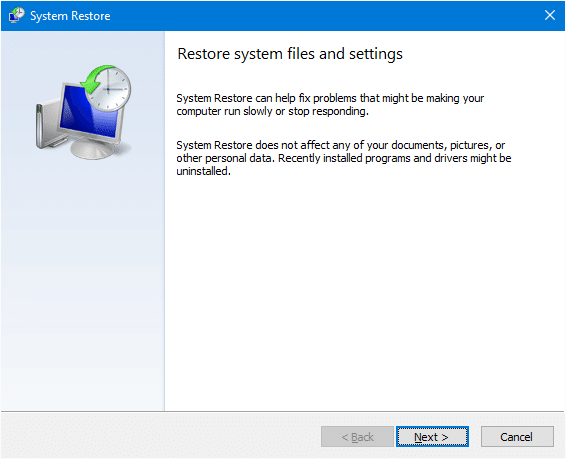
Click Next. In the dialog that appears, only some of the restore points are shown by default. To see the full list, click the Show more restore points check box to enable it.
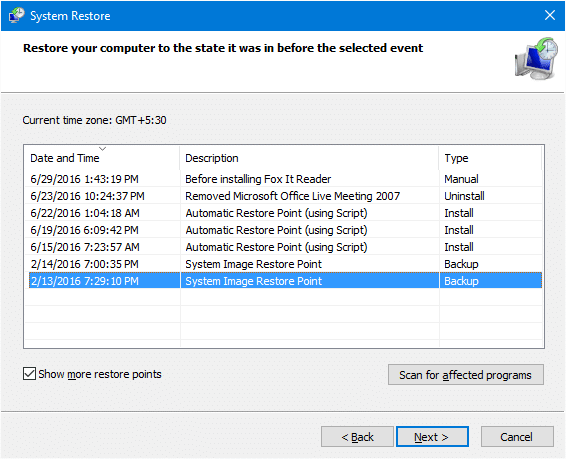
Select the restore point you want to restore the system to.
Optionally, you can see which applications would be affected if you rollback to that particular point. To view that information, click Scan for affected programs.
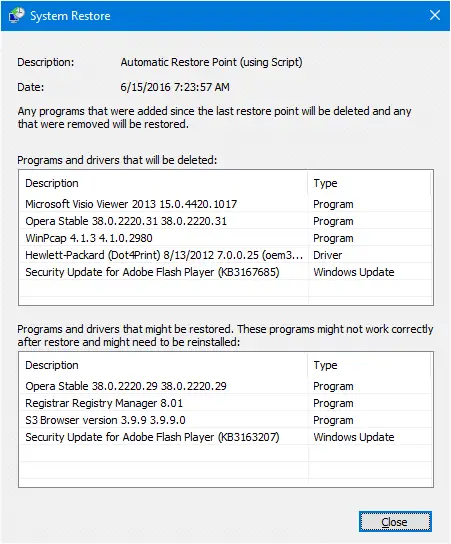
This shows the list of programs, updates and drivers that would be deleted, and the ones which would be restored back in the event you rollback to that restore point. This option can be very helpful to decide which restore point to choose from the list.
Close the Scan for affected programs dialog. Select your restore point from the list, and click Next.
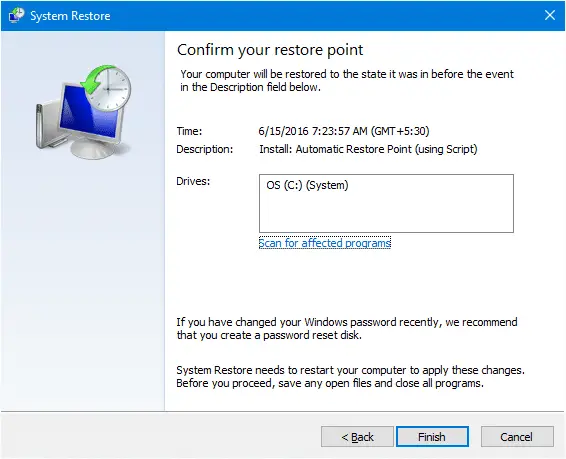
Click Finish. Windows will now rollback to the chosen point and then restart Windows automatically.
One small request: If you liked this post, please share this?
One "tiny" share from you would seriously help a lot with the growth of this blog. Some great suggestions:- Pin it!
- Share it to your favorite blog + Facebook, Reddit
- Tweet it!
Related articles
- How to Delete the System Restore Points in Windows
- How to Delete Individual System Restore Points in Windows?
This worked great. Thanks!
Clear explanations. Solid examples. I liked the inclusion of configuration methods.
I shared on FB and twitter 🙂