If searching through the Windows 10 Settings page is extremely slow or returns a “No results” message, this article has the solution.
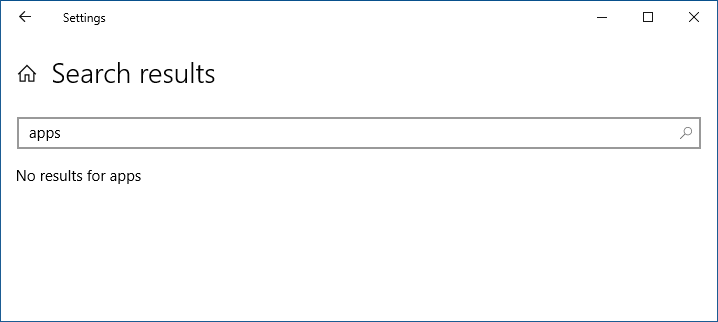
The the Start menu search feature may also be non-functional. Nothing may happen when you click Start and press a letter.
Related issue: Start search box is empty
Is your Start search window showing up empty, as in the following screenshot?

Workaround
Disabling Bing search for the Start/Search box circumvents the problem.
- Open
Regedit.exeand navigate to the following key:HKEY_CURRENT_USER\SOFTWARE\Microsoft\Windows\CurrentVersion\Search
- Create a new DWORD (32-bit) Value, and name it
BingSearchEnabled - Leave the
BingSearchEnabledvalue data to 0. - Under
BingSearchEnabled, double-clickCortanaConsent, and set its data to 0. - If the value
CortanaConsentdoesn’t exist, create it manually of type DWORD (32-bit). - Exit the Registry Editor.
- Log off and login back for the change to take effect.
Note: Once Microsoft fixes the issue at their end, you can delete the BingSearchEnabled registry value and then set CortanaConsent to 1.
[Fix] Search Results Showing No Results in Windows 10 Settings
Step 1: Check if Windows Search Service is Running
- Press WinKey + R, type
services.mscand press ENTER - Double-click
Windows Searchand set its start type to Automatic - Manually start the service by clicking Start in the services window.
Step 2: Reinstall the Search App using PowerShell
Start PowerShell and run this command to reinstall the search app.
get-appxpackage Microsoft.Windows.Search | Foreach {Add-AppxPackage -DisableDevelopmentMode -Register "$($_.InstallLocation)\AppXManifest.xml"}
If you receive an error that the package can’t be found, try running the following command from PowerShell Admin.
get-appxpackage Microsoft.Windows.Search -allusers | Foreach {Add-AppxPackage -DisableDevelopmentMode -Register "$($_.InstallLocation)\AppXManifest.xml"}
Log off and log back in. The search function should work correctly in the Start menu as well as Settings.
(Proceed to Step 3 only if required.)
Step 3: Fix the Settings Index folder path in the registry
The search app’s index should be regenerated after running the 2nd command. If that doesn’t help, try fixing the search app’s index path in the registry.
- Start the Registry Editor (regedit.exe)
- Go to the following location:
HKEY_CURRENT_USER\SOFTWARE\Microsoft\Windows\CurrentVersion\Search\Microsoft.Windows.Search_cw5n1h2txyewy\SettingsConstraintIndex
- Inspect the folder paths assigned for the values
LatestConstraintIndexFolder&CurrentConstraintIndexCabPath - Ensure the folder paths are valid and pointing to the correct folders. For example, here is the
LatestConstraintIndexFoldervalue data on my computer.C:\Users\Ramesh\AppData\Local\Packages\Microsoft.Windows.Search_cw5n1h2txyewy\LocalState\ConstraintIndex\Settings_{fefa25a2-43f6-4921-9bbb-56081442649c}The above folder has the following files related to the Settings search index:
0.0.filtertrie.intermediate.txt
0.1.filtertrie.intermediate.txt
0.2.filtertrie.intermediate.txt
Settings.ft
Settings.index
On some systems, the profile path or the
Settings_folder name may be incorrect. For instance, it may be incorrectly pointed to another user profile folder that does not exist on the system. Or, you may have renamed the user profile home folder and didn’t update the registry paths. - Fixing the value data for LatestConstraintIndexFolder & CurrentConstraintIndexCabPath fixes the search issues in the Settings app.

- Similarly, fix the CurrentConstraintIndexCabPath & LatestConstraintIndexFolder paths in the following registry key:
HKEY_CURRENT_USER\Software\Microsoft\Windows\CurrentVersion\Search\Microsoft.Windows.Search_cw5n1h2txyewy\AppsConstraintIndex
- Exit the Registry Editor.
The above paths are valid for Windows 10 v21H2.
Enable Content Indexing for “Immersivecontrolpanel” Folder
Note: This step is not required if you’re running Windows 10 v1903 or higher. The latest versions of Windows 10 don’t use this folder.
- Open the following folder in File Explorer:
C:\Users\%username%\AppData\Local\Packages\windows.immersivecontrolpanel_cw5n1h2txyewy
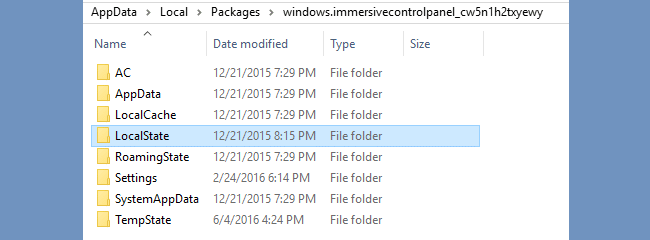
The above folder contains the XML files used by the modern Settings page. If these XML files are missing or their contents are not indexed, searching through the Settings page (WinKey + i) would return no results. So, let’s index this folder and its sub-folders and files. - Right-click
LocalStateand click Properties. Click Advanced. - In the Advanced Attributes dialog, enable the option Allow files in this folder to have contents indexed in addition to file properties
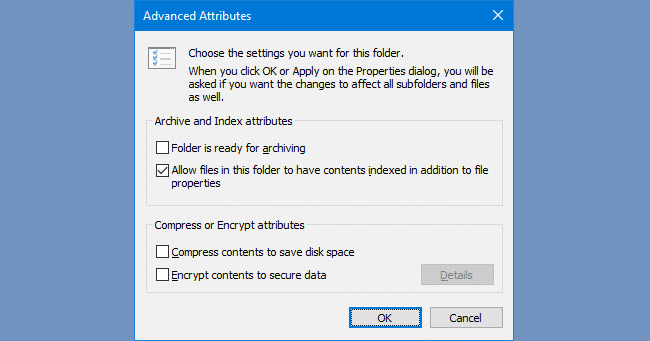
- Click OK, and apply changes to all sub-directories by selecting the option Apply changes to this folder, subfolders and files when prompted. If the checkbox is already enabled, uncheck the option and click OK. Then enable it back and click OK.
- Wait for some time for the search index to crawl files in the sub-folders. If it still doesn’t help, open Indexing Options in Control Panel, click the Advanced tab, and rebuild the search index.
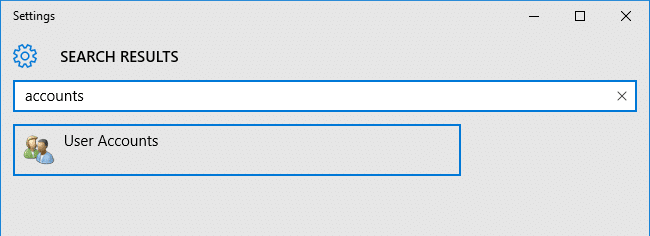
As a side note, to access “Accounts,” you’d simply click Accounts on the main Settings page. The screenshots are for illustration.
That’s it! I hope this fixes the search option on the Windows 10 Settings page.
One small request: If you liked this post, please share this?
One "tiny" share from you would seriously help a lot with the growth of this blog. Some great suggestions:- Pin it!
- Share it to your favorite blog + Facebook, Reddit
- Tweet it!
Related articles
- Fix: Start Menu Cortana Search Not Finding Apps & White screen
- Windows 10 Start Menu does not work or causes a “Critical Error”
Thank you! I had tried every ‘solution’ on several Windows forums. Your instructions to “Enable Content Indexing for “Immersivecontrolpanel” Folder” finally got Cortana search able to find Windows programs and Control Panel settings.
Yes.. You’re correct.. Got working for me too.. Thank you so much for sharing this post..
Enable Content Indexing for “Immersivecontrolpanel” Folder
… this was the solution I’ve been looking for. Cortana now finds Windows programs and settings.
Immersivecontrolpanel – yup, me as well. Was driving me nuts. Thanks!
I had two settings folders in the “ConstraintIndex” folder. I changed to the other one in the registry and restarted my PC. When it came up the search was working. Thanks for the incite on this issue!!
Thanks a million. Your solutions worked like a charm for me. I knew i broke something when i changed my user folder name manually (though i changed some registry entries described in that tutorial). Assigning the correct folder name in that registry entry you pointed out did the trick for me. It was driving me nuts for last couple of days and despite recreating the search index nothing really was working. Thanks
I tried this along with several other suggestions and noting worked. My solution was to create a new Windows user account. Once windows created the new account, I logged in as the new user and saw that search worked perfectly.
I opened up regedit and took a screen shot of the settings in the search settings location.
HKEY_CURRENT_USER\SOFTWARE\Microsoft\Windows\CurrentVersion\Search and saved it.
I then switched accounts and logged in as my original windows account and made sure that all the settings matched what was on the screen shot.
I didn’t even have to reboot and search started to work again!
Please help.. My husband is convinced that the windows search constraint index is something I have put in his computer system. He can not find anywhere on microsoft website that the constraint index does come installed with his version of windows 10. I also can not tell him otherwise if you can please validate that the constraint index is part or windows 10 windows search system index. This path also included files systemsynonyms.txt and appsynonyms.txt please help.