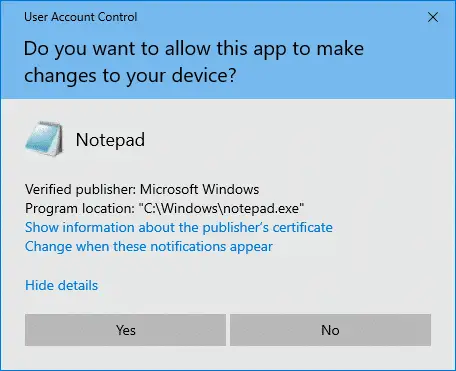
The User Account Control (UAC) elevation dialog is displayed on a secure desktop, and hence the Print Screen button wouldn’t capture it. If you’re a technical writer who needs to capture the User Account Control dialog to add it to documentation or help file, here are some ways to take a screenshot of the User Account Control (UAC) prompt.
How to Screen Capture the UAC dialog in Windows?
Method 1: Lower the User Account Control Slider (UAC) temporarily
Follow these steps to capture the UAC prompt using the Print Screen key.
- Open Control Panel, User Account Control settings.
- The User Account Control settings in the Control Panel show these 4 options:
- Always notify
- Notify me only when apps try to make changes to my computer (default)
- Notify me only when apps try to make changes to my computer (do not dim my desktop)
- Never notify me (UAC turned off)
- Set the UAC options slider to the 2nd lowest setting namely “
Notify me only when apps try to make changes to my computer (do not dim my desktop)“.

- Click OK and click Yes when asked for confirmation.
- Now, perform the steps that’ll trigger the UAC elevation dialog. For example, open Notepad as administrator. You’ll see the UAC prompt, but this time you can capture it using the Alt + PrintScreen key.

- Open Microsoft Paint, paste the captured image from the clipboard, and save the file.
Method 2: Disabling UAC Secure Desktop Security Policy
Note: As the Security Policy Editor is not available in Windows Home Edition, you may edit the registry or use the REG files below to disable the secure desktop elevation policy. See section Registry Fix below.
Local Security Policy
- Click Start, type
Secpol.mscand press ENTER - Expand Local Policies, and click Security Options
- Double-click the following option, and set it to
Disabled:User Account Control: Switch to the secure desktop when prompting for elevation
- Start a program that requires UAC elevation. The elevation dialog should now appear on the interactive user’s desktop and can be captured using the Print Screen key or using a third-party screen capture tool.

Using Registry Edit
The above setting is stored in the following registry location, in a DWORD (32-bit) value named PromptOnSecureDesktop.
HKEY_LOCAL_MACHINE\SOFTWARE\Microsoft\Windows\CurrentVersion\Policies\System
If the Security Policy Editor is not available in your edition of Windows, use the registry method. Download promptonsecuredesktop.zip, unzip the contents, and run disable_secure_uac.reg. (A restart may be required after applying the REG file.) To restore the original setting (highly recommended), run the file enable_secure_uac.reg.
Important: After finishing your task of capturing the UAC Dialog, re-enable the User Account Control: Switch to the secure desktop when prompting for elevation Policy.
Method 3: Using Remote Desktop
If you have another computer running Windows, you can use Remote Desktop Connection to log in to your Windows computer, and capture the UAC dialog shown in the host computer and save it.
One small request: If you liked this post, please share this?
One "tiny" share from you would seriously help a lot with the growth of this blog. Some great suggestions:- Pin it!
- Share it to your favorite blog + Facebook, Reddit
- Tweet it!
Related articles
- How to Take a Screenshot in Windows? Different Ways Explained
- Screenshot a Portion of the Screen in Windows 10 [Win+Shift+S]
Thanks, this page was a great help to me. Thanks!
Bravo!! You kept me from pulling out the few remaining bits of my hair. This was a huge help!
It works. Thanks a bunch.