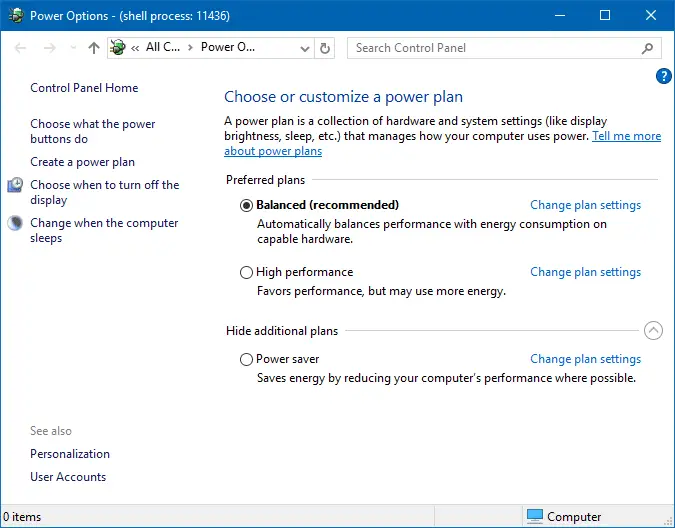
Switching power plans require you to open Power Options applet from Control Panel, or from the Start button’s right-click menu which can also accessed by pressing Win + X. This post tells you how to switch power plans using command-line or shortcut, which you can also implement in the context menu if you use it frequently.
Right now, as of Windows 10 v1607, the advanced power settings is not yet ported to the new Settings UI. Clicking “Advanced power settings” link in the “Power & Sleep” Settings page opens the old Power Options applet. Keyboarders can still use this key sequence to open Power Options — WinKey + X O
In the Power Options applet, you can choose one of the three options — Balanced, High performance and Power saver, or create custom plans with your preferred display and sleep timeouts and other power settings.

Switch Power Plans Using Command-line or Shortcut
If you switch power plans multiple times a day, you can create desktop shortcuts to do the task quickly using the powercfg.exe command-line tool.
Each power scheme is represented by a corresponding GUID. The GUID strings for your power plans can be obtained by running this command, from a Command Prompt window:
powercfg /L

381b4222-f694-41f0-9685-ff5bb260df2e [Balanced]
GUID: 8c5e7fda-e8bf-4a96-9a85-a6e23a8c635c  [High performance]
a1841308-3541-4fab-bc81-f71556f20b4a  [Power saver]
The above GUIDs are standard in all systems. For additional custom power schemes, the GUID would be random.
To set the current power scheme to “High performance”, you’d use this command-line.
powercfg /s 8c5e7fda-e8bf-4a96-9a85-a6e23a8c635c
This command makes the specified power scheme active on the system.
To quickly switch between power schemes, you can create desktop shortcuts for each plan with the above command.
Switch Power Plans via the Right-click menu
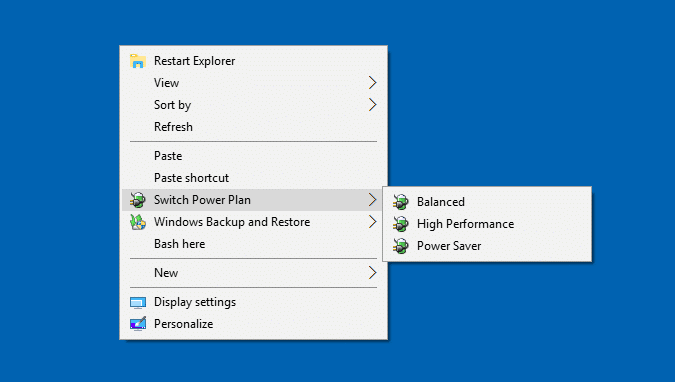
You can add the required options to change the power plan, to the desktop right-click menu.
Download switch_powerplan_context_menu.zip
Unzip and run the enclosed REG file. To reverse the changes, use the undo.reg file.
To create a REG file of your own, copy the following lines to Notepad, and save the file with the .REG extension. Double-click the REG file to run it.
Windows Registry Editor Version 5.00

[HKEY_CLASSES_ROOT\DesktopBackground\Shell\SwitchPowerScheme]
"Icon"="powercpl.dll"
"MUIVerb"="Switch Power Plan"
"Position"="Middle"
"SubCommands"=""

[HKEY_CLASSES_ROOT\DesktopBackground\Shell\SwitchPowerScheme\Shell\Balanced]
"MUIVerb"="Balanced"
"Icon"="powercpl.dll"

[HKEY_CLASSES_ROOT\DesktopBackground\Shell\SwitchPowerScheme\Shell\Balanced\Command]
@="powercfg.exe /s 381b4222-f694-41f0-9685-ff5bb260df2e"

[HKEY_CLASSES_ROOT\DesktopBackground\Shell\SwitchPowerScheme\Shell\High Performance]
"MUIVerb"="High Performance"
"Icon"="powercpl.dll"

[HKEY_CLASSES_ROOT\DesktopBackground\Shell\SwitchPowerScheme\Shell\High Performance\Command]
@="powercfg.exe /s 8c5e7fda-e8bf-4a96-9a85-a6e23a8c635c"

[HKEY_CLASSES_ROOT\DesktopBackground\Shell\SwitchPowerScheme\Shell\Power Saver]
"MUIVerb"="Power Saver"
"Icon"="powercpl.dll"

[HKEY_CLASSES_ROOT\DesktopBackground\Shell\SwitchPowerScheme\Shell\Power Saver\Command]
@="powercfg.exe /s a1841308-3541-4fab-bc81-f71556f20b4a"
After applying the edit, the entries are added as a cascading menu in the desktop context menu.

See also: Add Windows Backup and Restore Options to Desktop Right-click (Cascading) Menu
Windows 10 Settings UI will ultimately replace Control Panel in the near future. There will come a day when we’ll have to kiss goodbye to the classic Control Panel, a special folder which has been there for years. These power plan switching shortcuts may come in handy at that time, especially.
One small request: If you liked this post, please share this?
One "tiny" share from you would seriously help a lot with the growth of this blog. Some great suggestions:- Pin it!
- Share it to your favorite blog + Facebook, Reddit
- Tweet it!
Nice, works everytime !
I just used your Switch Power Plans via the Right-click menu switch_powerplan_context_menu.zip however I modified it slightly to “Position”=”Bottom” and I think it looks and fits in ALOT better…give it a try…I also added a Custom Power Scheme. Thanks for your contribution and work!!!
Thanks man very handy
Thanks it worked well. Just one question could this be add to the taskbar right click and how please?